Thursday 31 July 2014

Grow Your Own Wheatgrass


Wheatgrass juice is nature’s finest medicine. It is our signature elixir here at Hippocrates Health Institute. It is the icon in our logo. It is a powerful concentrated liquid nutrient. Two ounces of wheatgrass juice has the nutritional equivalent of five pounds of the best raw organic vegetables! It is also a powerful detoxifier pulling poisons, stored toxins, and heavy metals out of the body.

It is best to grow wheatgrass indoors. The ideal temperature range is between 65-75 degrees F and humidity less than 50%. You want plenty of indirect sunlight and plenty of artificial light (full-spectrum is best) but, no direct sunlight. Keep the lights on for about twelve hours a day and turn them off at night.

Origin:
• Mesopotamia Health Benefits:
• Blood builder • Anti-cancer
• Detoxifier
• Boosts the immune system

Growth Process:
1. Soak 1 cup seeds for 8 hours.
2. Drain. Rinse and drain again.
3. Rinse twice a day for one day. Double rinse each time.
4. Plant in ½ “ compacted potting mix in a 10” X 10” tray with drainage holes.
5. Water and keep the tray supported so it can drain well.
6. Water twice a day for 7 days.
7. Keep covered with an empty tray for the first 3 days.
8. Keep in a brightly lit area.
9. Harvest at the beginning of the jointing stage. Yields up 9 ounces of juice. It is best to juice it fresh.

Maturity Time:
• Seven days

Tuesday 22 July 2014

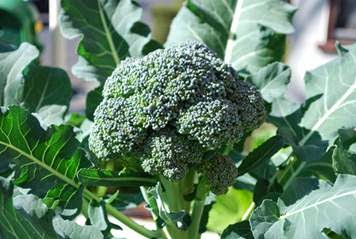
Grow Your Own Broccoli

Broccoli is very high in the master antioxidant glutathione and other important nutrients. Like all amino acids glutathione is very heat sensitive and on average is seventy-five percent destroyed by the cooking process. Therefore, broccoli is best eaten raw food.

Broccoli is a cool weather plant and does best in zones 3-7. Plant in the early spring, late summer or, in warmer climates, over the winter. Here is how to grow broccoli right in your own yard:
  • Start your spring crop indoors 7 to 9 weeks before the last expected frost. Fill 4” round Fertil pots with 100% organic potting mix and place in a drain pan. Plant two seeds per pot. Water and keep the soil moist but not wet. Seeds should germinate in 4 to 5 days. After the seeds germinate, place pots in a sunny area or under lights.
     
  • Once the seedlings are about 6 inches tall, with 2 to 4 true leaves it is time to harden the plants. Harden by putting the young plants outdoors in a protected area (out of direct sun and wind) for one hour the first day adding two hours to the time spent outside each subsequent day for a week. Keep well watered.
     
  • Choose a place in the yard that receives full sun. If you live in a warmer climate partial shade can help prevent the plants from bolting (going to seed.) Prepare a bed of rich, well-drained soil, with plenty of compost.
  • Set the young plants 1 to 2 inches deeper in the garden than they grew in the pots or flats. Space them 2 feet apart in rows 3 feet apart. Firm the soil and water well.
  • Water regularly. At least once every three days if it is not raining.
  • Two weeks after planting fertilize with compost tea or side dress with compost. Repeat once a month.
  • Spray once a week alternating between insecticidal soap and home-made plant pepper spray.
  • It is time to harvest before the florets start to open and turn yellow. Cut just below the point where the stems begin to separate. Once you’ve harvested the main head, tender side shoots will form in the leaf axils all along the lower stalk. Keep cutting, and broccoli will keep producing until the weather turns too hot or too cold.

Fresh-picked garden broccoli tastes much better and is more nutritious than store bought varieties. Enjoy!

Wednesday 16 July 2014

Grow Your Own Asparagus

Asparagus has the highest glutathione levels of any food. Glutathione is the master phytochemical and is unmatched in its ability to remove poisons from the body. Asparagus is one of the best cancer fighting foods. It is also rich in B vitamins, vitamin C, calcium, and iron.

Asparagus is a cool weather perennial crop that thrives in any area having winter ground freezes. If properly planted and cared for it will keep coming back and producing for 20 years or more! Here is how to grow asparagus:

• Choose an area of your yard that is well drained and receives full sun. Prepare a planting bed 5 feet wide by 10 feet deep by removing all grass and roots and then turning in at least 50% well aged compost 12 inches deep into the existing soil. The richer the better.
• Purchase twenty 1-year old ‘Jersey Knight’ or Jersey Giant’ crowns. This should produce enough be adequate for a family of three.
• Soak the crowns in compost tea for 20 minutes prior to planting.
• Make 4 rows 12 inches apart. Plant the crowns 6 inches deep with 24 inch spacing.
• Cover the crowns with 3 inches of soil. After two weeks cover again with another 3 inches of soil. After another two weeks add more soil until the soil is slightly mounded above ground level to allow for settling.
• Cover with mulch so your tender young spears do not have to compete so much with weeds.
• Water regularly. At least once every three days if it is not raining.
• Fertilize three times a year with compost tea or side dress with compost.
• Spray once a week during the growing season with insecticidal soap or pepper spray.
• During the winter months cover with 6 inches of straw or light mulch to provide protection from the cold.
• Don’t harvest any spears in the first two years so that all their energy can be used for establishing deep roots.
• In the third year, harvest one-fourth your crop every week over a four week period. Use a sharp knife to cut the spears at the ground level.
• In the fourth year harvest one-eighth of your crop over an eight week period.

Fresh-picked spears are far more tasty and tender than store-bought ones. Enjoy!

Wednesday 9 July 2014

Let's Grow the Red, White and Blue !...

In celebration of Independence Day we thought we would bring a little Red, White, and Blue into your kitchen. The three vegetables that we chose to demonstrate our patriotism are Red Bell Peppers, Cauliflower, and Red Cabbage (which is really purple/bluish in color.)

Red Bell Peppers:
When to Plant:
Start from seeds indoors eight weeks before the last frost. Transfer seedlings outdoors into the ground 2 to 3 weeks after the last frost. 

 
What They Are Good For:
Vitamin C
Vitamin E
Carotenoids (alpha-carotene, beta-carotene, lycopene, lutein, cryptoxanthin and zeaxanthin)
Antioxidant Phytonutrient (luteolin)

Cauliflower:
When to Plant:
Start from seeds indoors six weeks before the last frost. Transfer seedlings outdoors into the ground 2 to 3 weeks before the last frost.

 
What They Are Good For:
Vitamin C
Vitamin K
Manganese
Folate
Antioxidant Phytonutrients (Beta-carotene, beta-cryptoxanthin, caffeic acid, cinnamic acid, ferulic acid, quercetin, rutin, and kaempferol)

Red Cabbage:
When to Plant:
Start from seeds indoors eight weeks before the last frost (for early types.) Transfer seedlings outdoors into the ground four weeks before the last frost (for early types.) 


What They Are Good For:
Vitamin C
Vitamin K
Vitamin B6
Maganese
Antioxidant Phytonutrients (polyphenols)

Tuesday 1 July 2014

Colon Cleansing

There’s no debate at all in medical literature: You need a clean and healthy colon to assimilate nutrients and dispose of waste. Yet millions of people have colons that are congested, twisted out of shape, and impacted with toxic waste. This can cause a multitude of bowel disorders and chronic diseases. This isn’t surprising-even though a person may have a bowel movement daily, there may still be several days’ or even a week’s worth of waste inside the colon. A badly impacted colon can be carrying an excess of ten pounds of fecal matter at one time. This provides a breeding ground for unfriendly bacteria that can cause problems such as headaches, flatulence, indigestion, colitis, and bowel cancer. When these wastes accumulate, the colon becomes weak and sluggish, causing constipation. The accumulations tend to harden in the pockets of the colon walls. This hardened material obstructs the peristalsis (the natural muscular contractions of the bowel) and more and more buildup occurs. This, in turn, interferes with final absorption and digestion; instead of absorbing nutrients, the undigested food putrefies, creating toxic conditions.

Quick Tips for a Healthy Colon - To achieve a healthy colon, start with these three simple steps:

1. Respond to nature’s call to eliminate. Try to establish a routine bowel movement first thing in the morning. All night, bowl functions have been active on the bacterial level and inactive on the metabolism level-they need relief in the morning. Repeat once more if possible.

2. Place a footstool or box under both feet when seated on the toilet. By raising the feet off the ground, you put yourself in a squatting position that is more natural and encourages easy elimination.
(The design of the modern toilet has contributed to countless cases of constipation.)

3. Exercise. Exercise prevents the abdominal muscles from sagging and becoming weak. It brings oxygen-rich blood to the intestines, which gives the cells health and vitality. Exercise also stimulates peristalsis (but do not exercise immediately after eating because the process of digestion requires a great deal of energy).