Tuesday 23 September 2014

Fun Fact Friday

Meet Holy Basil.  This herb is native to India where it is considered a sacred plant that is said to clear the aura and open the heart.  Holy Basil, or Tulsi, is best known for its ability to help the body adapt to stress. It grows abundantly right here in our Hippocrates Organic Garden.  What a great way to find some all natural stress relief during one of our breaks. It only takes a couple of leaves to turn it into a comforting tea!

Holy Basil Tea:

•  Simply cover 2 teaspoons of fresh tulsi leaves (5 leaves or so) with 8 oz of hot water.
•  Cover it and let it steep for about 5 minutes.
•  Strain the leaves off and enjoy!

 Healthy is so fun!

Monday 15 September 2014

How to Start a Garden

From the Hippocrates Health Institute Garden: 


Are you considering starting a new vegetable garden next Spring? Sheet mulching in the Fall is an excellent way to convert a part of your lawn into a nutrient rich garden plot ready to plant seeds and starter plants in the Spring. The secret to successful gardening is in the quality of the soil. Sheet mulching is the application of thick layers of organic matter which, over the winter convert into rich loom as a result of the action of the trillions of microscopic microbes in the soil.

Choose a location in the yard that is relatively level and receives the most amount of sun throughout the day. All other things being equal your new garden plot should be located relatively close to the house, close to the water hose faucet, and close to the shed (where you will be keeping your gardening tools. Here is what you will need to get started:

Ingredients:

1. Compost
2. Mulch (or seed-free straw)
3. Rock dust
4. Cardboard
5. Mixed organic material (grass clippings, leaves, kitchen food scraps, wheatgrass root mats, and/or seaweed.)

Preparation:

1. Spread a 2 inch layer of compost over a 10’ X 10’ area of your existing lawn. Wet it down with the hose.

2. Cover the compost with at least two layers of cardboard. Wet it down again with the hose.

3. Cover the cardboard with another 2 inch layer of compost. Sprinkle a few pounds of rock dust evenly over the compost. Wet it down again with the hose.

4. Cover the compost with at least12 inches of mixed organic material (Grass clippings, leaves, kitchen food scraps, wheatgrass root mats, and/or seaweed.) Wet it down again with the hose.

5. Top it all off with 2 inches of mulch. Wet everything down well with the hose.

Occasionally water your garden-in-the-making to keep it moist. Soil microbes and earthworms will toil through the Fall and Winter to decompose the organic material, cardboard, and mulch leaving behind a nutrient-dense loom ready for planting in the Spring.

Tuesday 9 September 2014

Grow Your Own Stevia

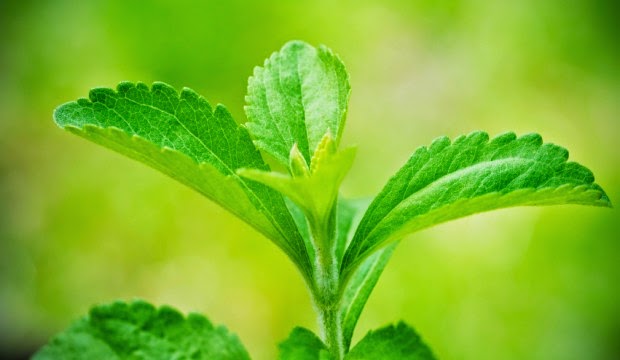
Stevia is a very sweet plant that has zero calories and a glycemic index of zero. This makes it an excellent choice for people who would like to transition away from sugar and other high-glycemic sweeteners. However, since the refinement process in stevia extracts strips away antioxidants and some of the plant’s other healthcare properties it is best to grow your own stevia plants at home and use the whole leaf as a sweetener.

Here is how to grow stevia:

1. Start the seeds in a tray indoors early in the Spring about one month before the last frost. Use 100% organic potting mix and plant the seeds to a depth of ½”. Due to the low germination rate of the seeds you should plant three times the usual number of seeds. Make sure you are getting stevia rebaudiana since this is the only sweet variety.

2. Keep the soil moist. It is best to water from underneath by using a plug tray (with holes) inside a web tray inside a standard flat (without holes.) Keep about ½” of water in the bottom of the standard flat tray.

3. Choose a location in the garden that receives full sun. Prepare the soil with 50% organic compost and 50% peat moss.

4. Stevia prefers warm weather. Transplant the seedlings outdoors several weeks after the last frost. This means sometime in May for most parts of the United States.

5. Set the plants two feet apart.

6. Water regularly and do not allow your stevia plants to dry out.

7. The plants will grow 16” to 24” tall depending upon the temperature. Trim the plants when they reach a height of eight inches tall and again at twelve inches to maximize leaf production.

Raised beds are ideal for stevia since they allow excellent drainage. To increase your supply of stevia plants you can use the stem tips to create new starts by rooting them in trays with moist potting mix.

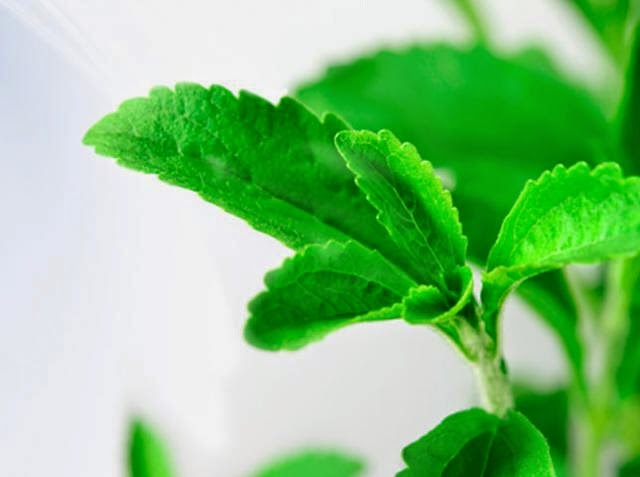
Use the fresh leaves during the growing season to sweeten tea. The sweetness in the leaves is approximately one-fourth as concentrated as the white, powdered stevia sold at the store. Many people seem to like fresh stevia (or the powdered dried leaves) better than the concentrate, but you should try it for yourself.

Tuesday 2 September 2014

Grow Your Own Okra

Okra is well known as a blood sugar balancer which makes it a very powerful tool for diabetes. Less well known are okra’s anti-cancer benefits. Studies on okra’s effect on cancer have shown that:

• Okra kills 72% of human breast cancer cells in vitro
• Okra pectin inhibits 75% of highly metastatic melanoma cells in vitro
• Men who eat okra have 40% less prostate cancer

Okra is a hot weather plant and grows well in Southern Florida. Here at the Hippocrates Health Institute we harvest plenty of freshly-picked okra every day this time of year and deliver it straight to the kitchen for the ultimate farm-to-table experience for our guests. Wait until the weather is warm to set out your Okra plants. Plants like it when nights are at least in the 60s and days 85 or warmer. Soak your okra seeds overnight for the best germination. Choose a sunny location and plant the seeds in fertile, well-drained soil about 1/2 to 1 inch deep and 12 to 18 inches apart.

Water right away and continue watering once a day on those days it does not rain. Once every two weeks fertilize with compost tea or side-dress each plant with compost. Warm weather helps podsgrow quickly, so check plants every day once they start producing. A pod can grow from nothing to full size in 2 or 3 days. Pods first appear at the base of the plant up so that by the end of the season you could be on your tiptoes to harvest.

Pods are ideal when 2 to 4 inches long; they get very tough and stringy if allowed to stay on the plant. Always remove any that are too big to eat because they keep the plant from producing. Use pruning shears to cut the pods with a short stub of stem attached. Okra is best eaten raw as many of the health-giving nutrients are heat sensitive.